Joshua makes the best out of a venue’s lighting situation. Learn how to use multiple sources of lighting in portraits to make your subject pop.
Lighting 101
Get out a pen and some paper, because you’ll want to take notes for this. Today we will be diving into the non-negotiable importance of good lighting.
As a photographer, the lighting you’re forced to shoot with may not be the most ideal for you. But, this doesn’t mean that you can’t fix it.
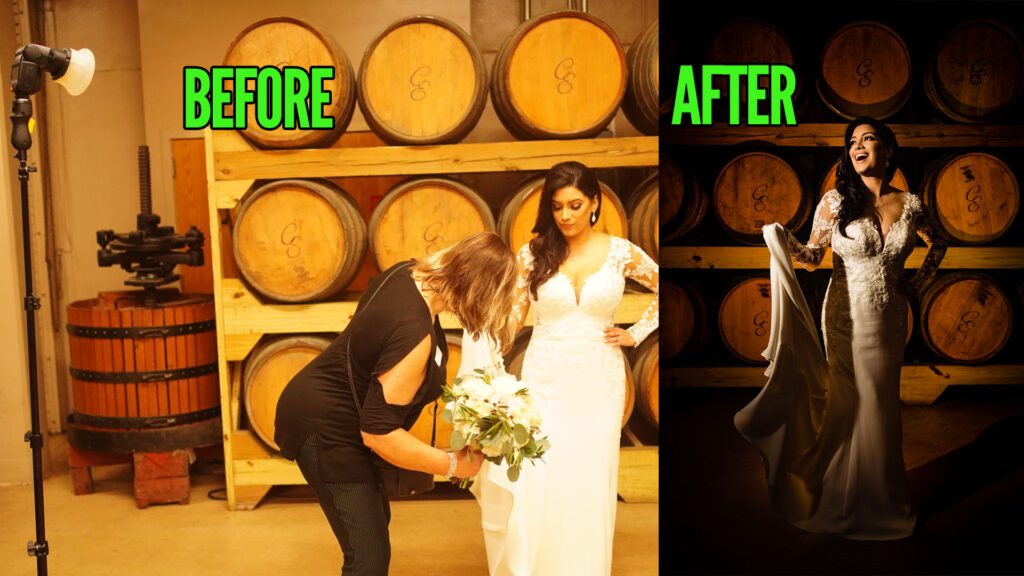
At the venue, you may find the lighting you’re given to be quite the obstacle. For example, in this behind the scenes video, Joshua shows us what it was like having to take harsh fluorescent lighting into account when shooting photos and how he overcame that.
Set A Strong Background
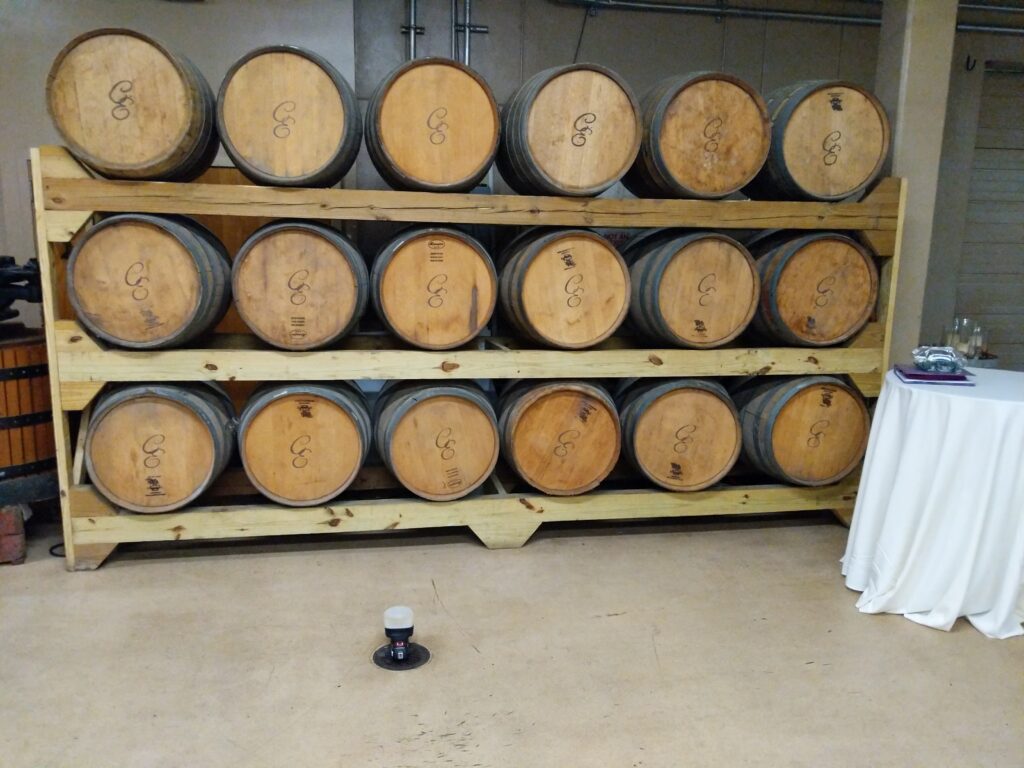
In order to capture the best photo for your subject while working with iffy lighting, one must solidify the background first. Joshua decided to work with barrels as a backdrop since it really encapsulates the vibe of the vineyard, but they definitely needed some lighting work.
For a dramatically lit portrait, Joshua is using a flash on the floor to light the background up. By placing the camera-triggered flash on the floor with a full CTO gel, it gives the barrels the candlelit look he’s looking for.
Pro tip: CTO stands for “color temperature orange.” Photographers mainly use this when converting bright daylight colors to cooler tones for a shot.
Let’s Get Technical
In this case, Joshua also adds in a MagMod MagSphere on top of the flash. Adding a MagSphere spreads out the light from the flash, evenly applying this effect to the whole frame. So in this example, we see that the light isn’t necessarily softened, but rather it’s more spread out across the barrels.
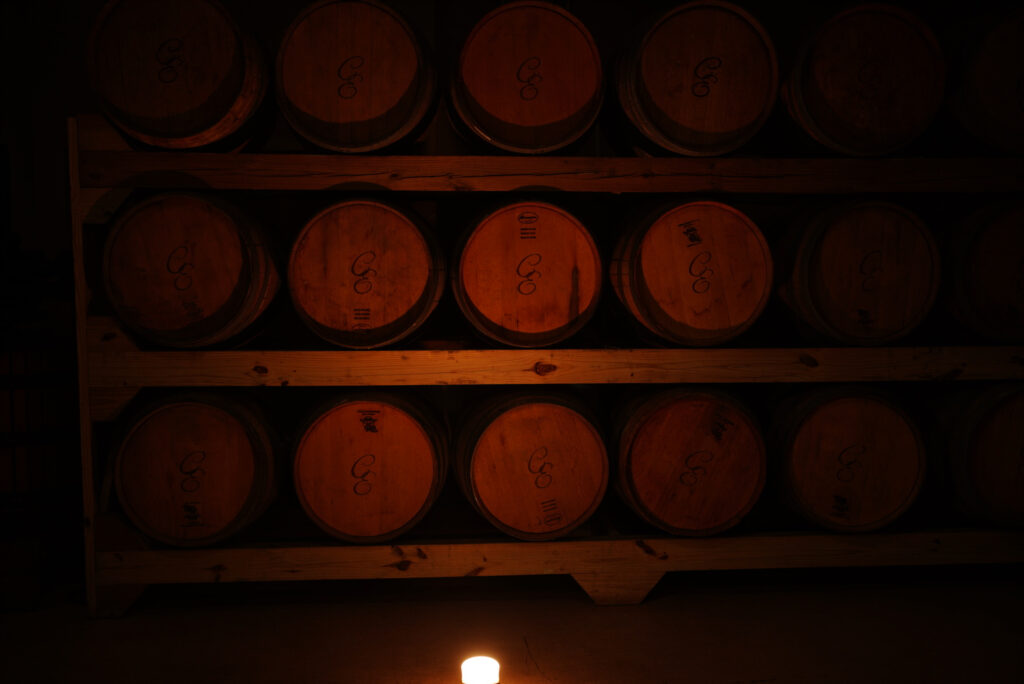
Using a 35mm lens, Joshua emphasized the dark exposure by putting the shutter speed at a solid 1/160, ISO 160, and the aperture at 2.5. When determining the strength of the flash, it’s up to you to play around with the frame a few times to get it just how you want it.
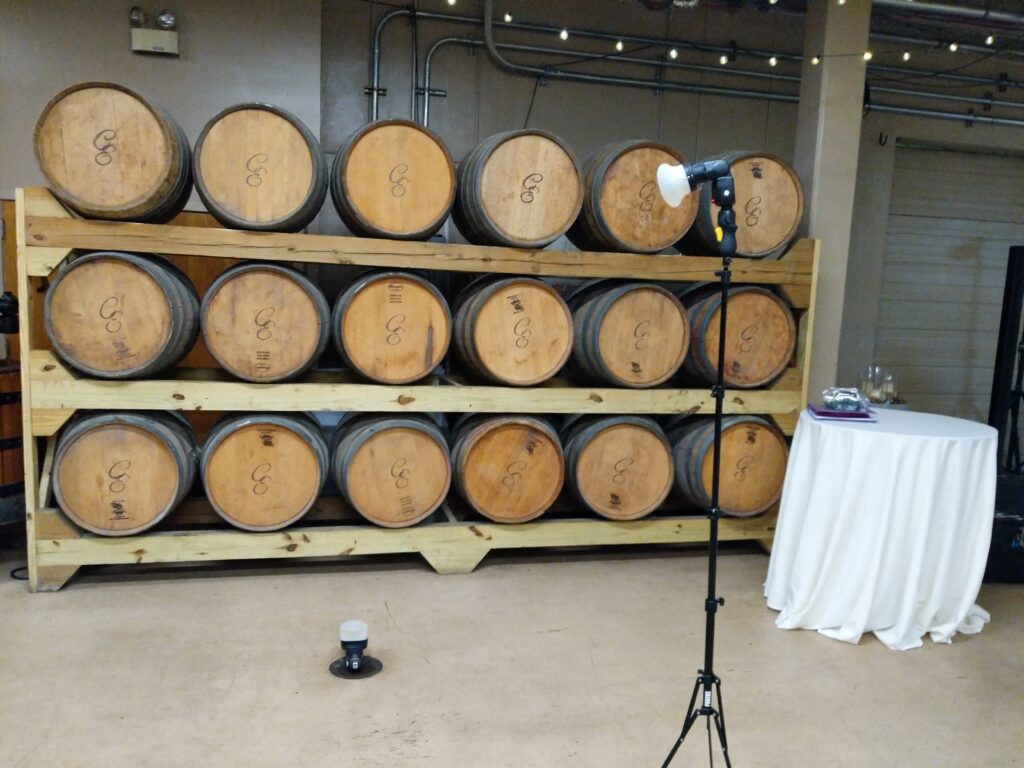
In addition to the ground flash that’s now set to be behind the bride, Joshua set up a MagGrid with another MagMod MagSphere on top at 45 degrees facing where the bride will be standing.
Adding a MagGrid provides a tight beam of light so that the lighting hits the subject instead of the general background. And as previously mentioned, the MagSphere spreads that light beam out and helps soften any harshly lit hotspots of the portrait.
Background, check. Lighting, check. Subject, check. Let’s get to posing. Posing your subject with so many light sources brings new challenges, but ultimately it’s up to you as the photographer to decide what looks best.
Here Comes the Bride
Now that the ambient exposure is all set up, it’s time to bring in the subject. By placing the bride in front of the background flash, the brightest part of the frame is directly behind her. Posing a subject in front of the light allows them to be outlined by backlighting and automatically makes them stand out.
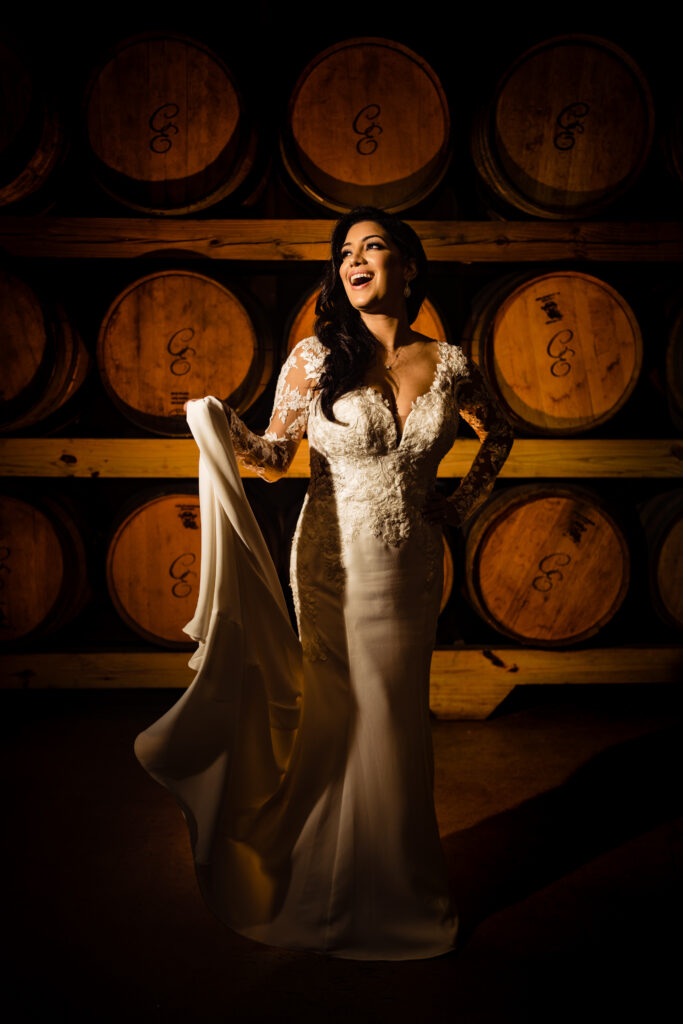
For this particular shoot, Joshua experimented with some in-action shots to create movement. As we see in the video, the bride is moving around and creating an authentic flow of movement in these photos while her features are simultaneously highlighted by the light. That’s thanks to the MagGrid. Getting the subject to look at the light will create more highlights, flatter their features, all while adding a defined structure.
Did You Learn Something Today?
So, let’s recap. Lighting is key, and there are plenty of ways to make it work in your favor. Once your lighting is set, the rest of the portrait falls into place. Next time you have a portrait shoot, try using some of the tips from this video, and hopefully it will prove how crucial lighting is when making your portrait pop!
For more photography tips and content, visit the rest of the blog here, and don’t forget to subscribe to The Shutter School YouTube channel!

