
Practice photography from your home by looking around and getting creative. Learn how to use your surroundings to make a great composition with The Shutter School’s “Location Hacking” series.
Practice Location Hacking at Your Doorstep
Welcome to location hacking, where your creativity will ultimately be put to the test! The idea of location hacking is learning how to make an awesome picture using minimal tools. As a photographer, you can’t rely too much on what’s around you to make for an interesting photo. You have to make it yourself.
Hopefully with these tips, you’ll learn how to disguise the ugly things and enhance the pretty things.
To practice, maybe start off at the front door of your house. Using something like a door can be really useful when sharpening your creativity skills, because it’s a plain and simple background that challenges you to keep the composition interesting. Plus, standing by the door usually involves some sort of natural light to work with. Although when photographing at the front door, try not to take these portraits during prime hours when direct sunlight is shining through. This will make for less harsh of a lighting effect.
Working with Falloff
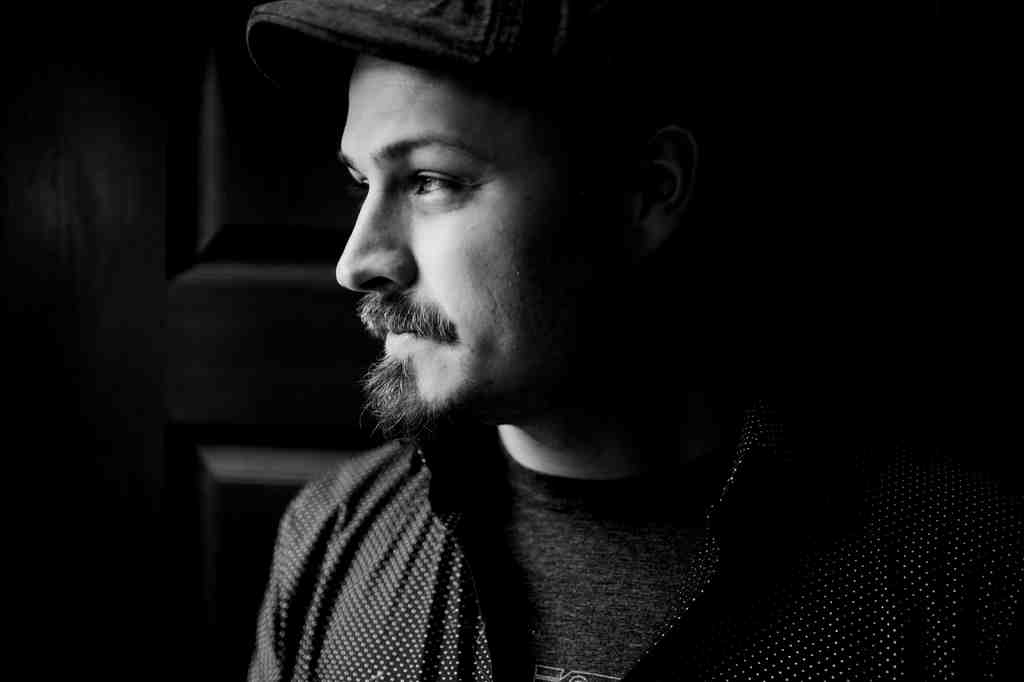
One key thing to note when taking front door portraits, is that you’ll most likely be working with “falloff.” For those who are just getting into photography, falloff is a reference to the effect in which the light is dimmer on one side. In portraits, that means that where the light is present, the subject will naturally be emphasized. Where the light is darker, the lighting effect will drop off. This causes a dark and light contrast within the composition.
At the door, you may notice that you’re experiencing some falloff with the natural light coming in, so only one side of the face is being highlighted by the light. This effect can be really effective for portraits, and as the photographer, you have control over what you want to highlight and how.
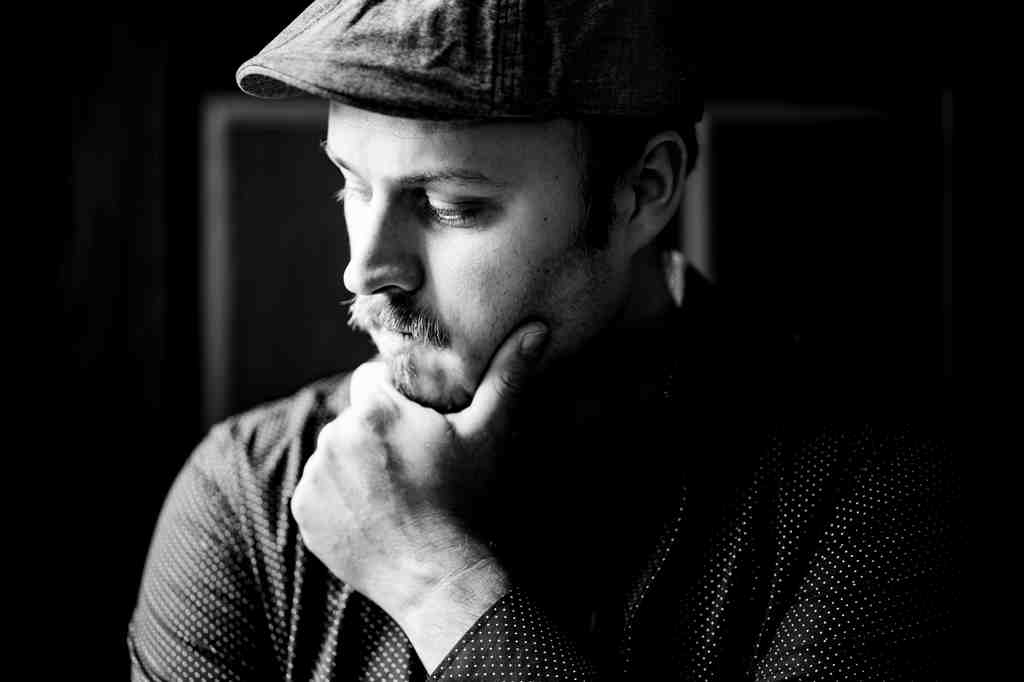
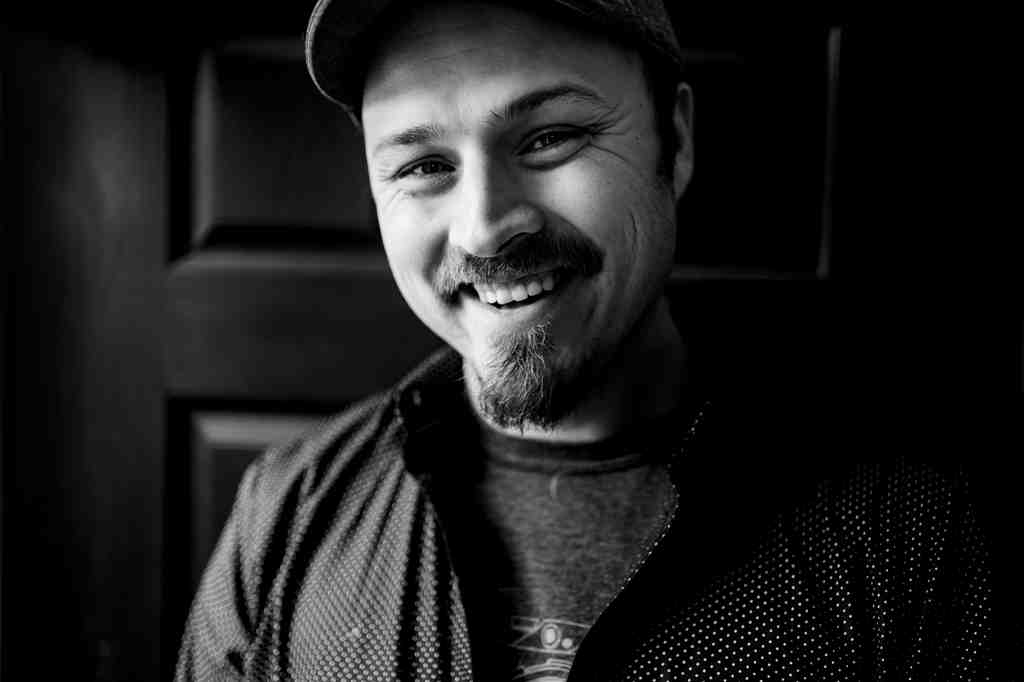

One general tip to note when working with subjects is the difference that falloff may have on gender-specific features. For example, a male looking straight ahead at the camera will create a contrast in dark and light shadows, producing a more dramatic look. If a female is being captured with a noticeable falloff, then her features can be accentuated more simply by looking into the light.
If you run into any lighting issues during the front door portrait-taking process, it’s always a possibility to bounce the light back in to decrease any extreme contrasts. Using a reflector or even adjusting the amount of light coming from other windows can be helpful to create a less dramatic falloff effect.
When working with falloff, have your subject (or yourself when taking self-portraits) look away from the shadow to highlight the cheek. Or as previously mentioned, your subject can look parallel to the window for a more masculine and dramatic look.
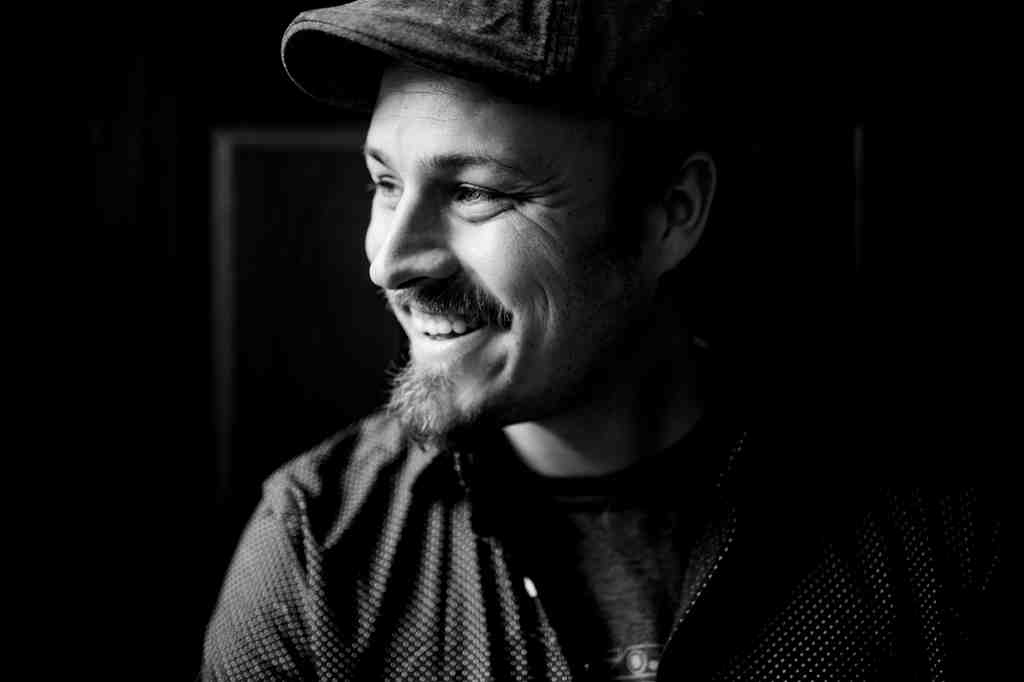
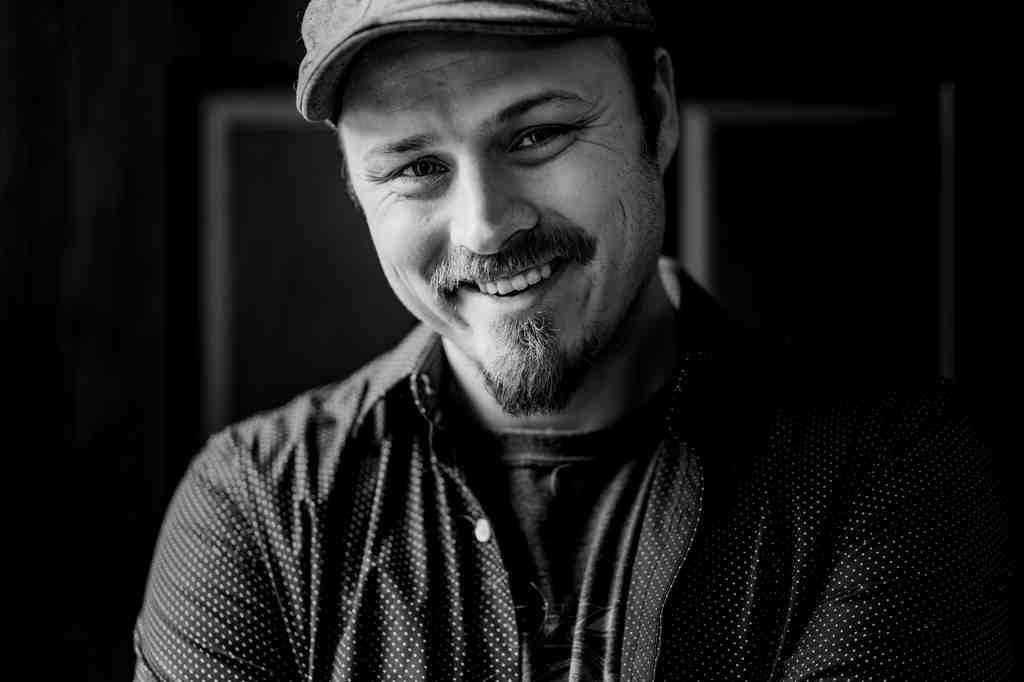
Lenses and Blur
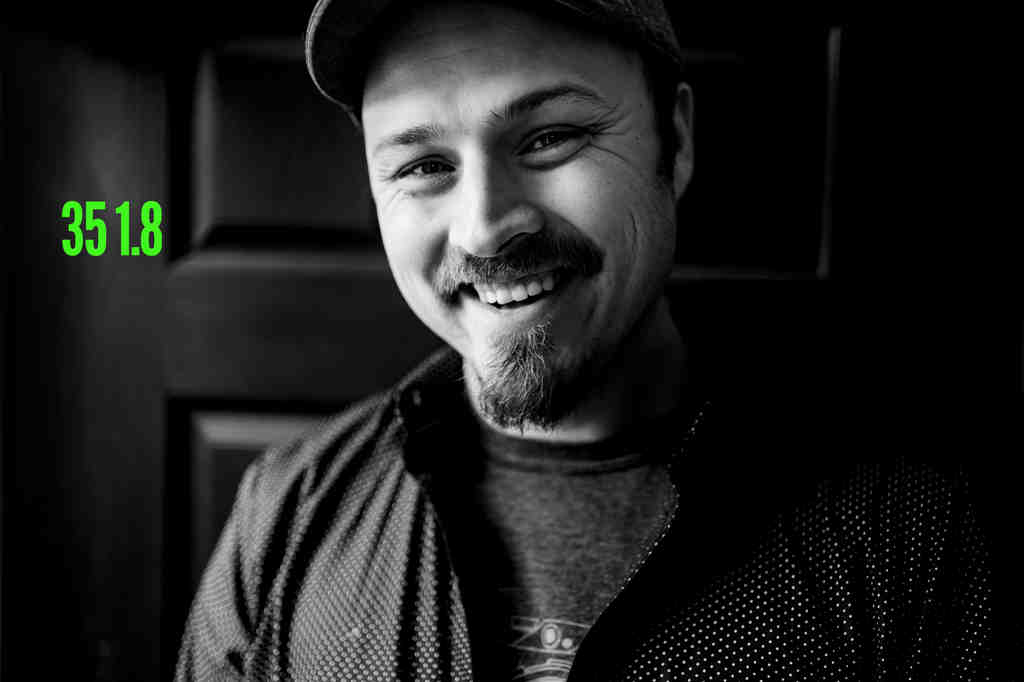
In the photo shown above, you’ll see an example of the blur effect using a 35mm 1.8G lens. Notice that the closeness of the subject allows for greater falloff. The background is not much different from the 85mm 1.8G lens (below), but the 35mm example provides a closer up view of the detail on the door.
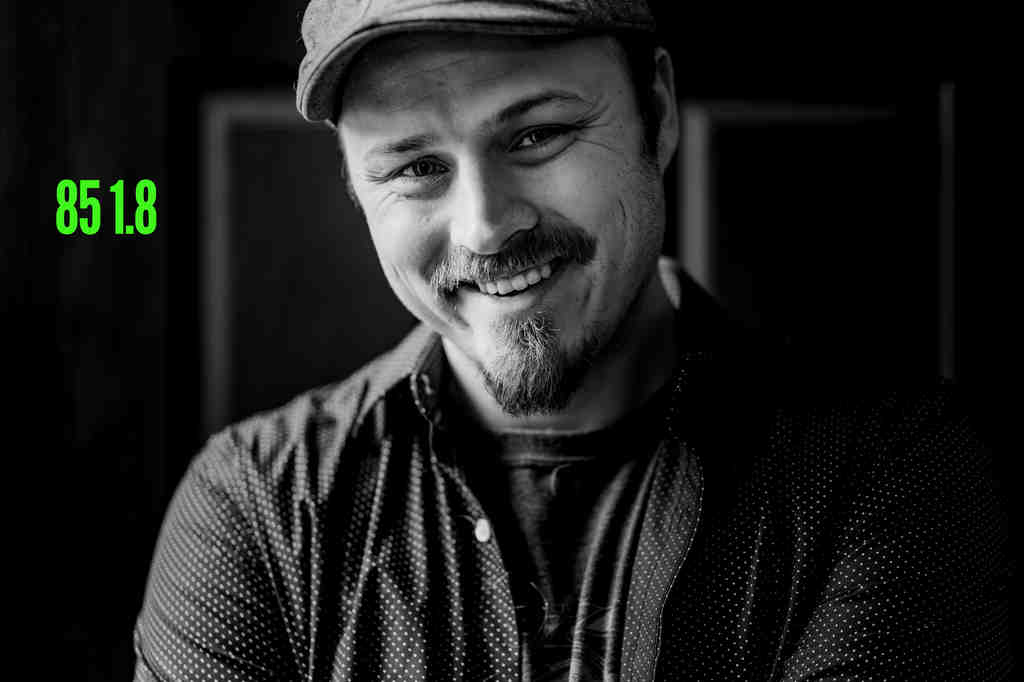
For reference, the 35mm 1.8G lens was physically closer to the subject, and in turn, the subject was closer to the background. Whereas the 85mm 1.8G lens was further away from the subject, yet clearly focused in on the composition and made for greater blur in the background.
If you’re looking for a more prominent blur effect, you may want to consider using a telephoto lens. This lens produces a more flattering, narrower viewing angle, and allows for a closer look at the subject without picking up certain details in the backdrop as we see above.
Get Practicing!
If you don’t have a subject available but you still want to practice experimenting with falloff, try out self-portraits. Check out our last blog post for handy some self-portrait tips here. Now, find some natural light and get to work! If you try out any of these location hacking tips, feel free to share them on The Shutter School Facebook page.