
Joshua talks about an engagement photo session in a garden, and how he used scenery, lighting, and shooting angles to his advantage. He also discusses the importance of learning from your photos and things to think about for next time.
Something that is really important in the photography world is the idea of improvement. Photography requires high attention to detail, and it’s okay for photos to not be at their very best all the time, but that’s why it’s important to learn.
After a shoot, try going through your photos and see what worked for you and what didn’t work so well. Then, you can begin to improve your technique and make notes to try out new things for next time.
Today we’ll be going through some details from Joshua’s garden engagement session and as always, we’ll be learning a thing or two.
Posing Tip
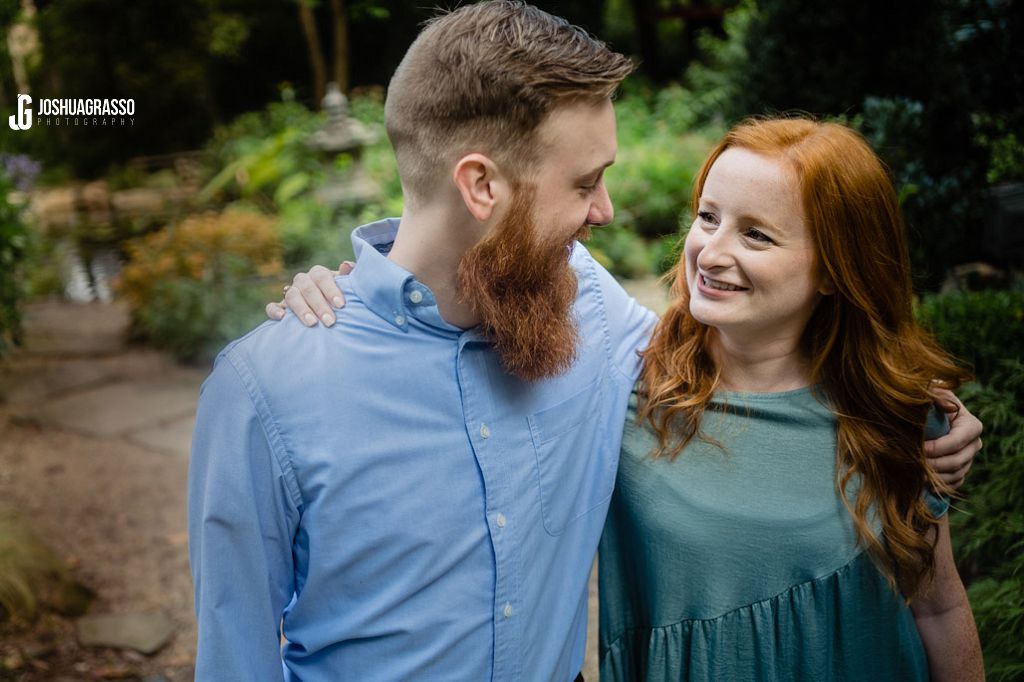
In this garden scenario, Joshua’s subject was sensitive to one of her facial features. Knowing this bit of information means it’s now the photographer’s job to deemphasize that feature in a portrait. For example, if the subject wants to be careful about how her nose appears in a portrait, then the photographer can take steps to work around that sensitivity.
Joshua was able to minimize that facial feature by shooting the subject head-on rather than from the side. When Joshua captured her from head-on, he made sure that her face and both cheeks were more prevalent than her side profile.
Background Tip
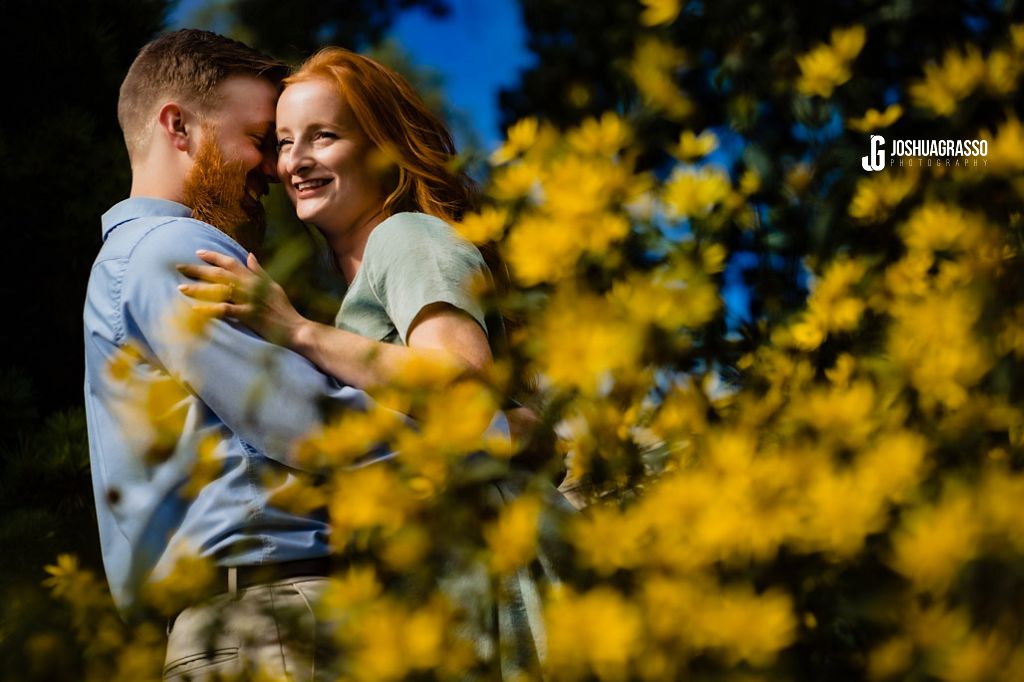
In many of the photos showcased in this video, we see the subjects being highlighted by the light. This is one of the most useful tips to remember in photography: the lighting on the subjects should be brighter than the background or any other part of the frame.
In order to create a unified focal point, it is important to create light around your subjects to prevent any other distractions from catching the viewer’s eye. Lighting can make or break a portrait, especially when you are trying to emphasize the people you are capturing. Feel free to refer back to the Two Light Portraits post on the blog to read more about how to effectively shed light on your subject.
Shooting Angles
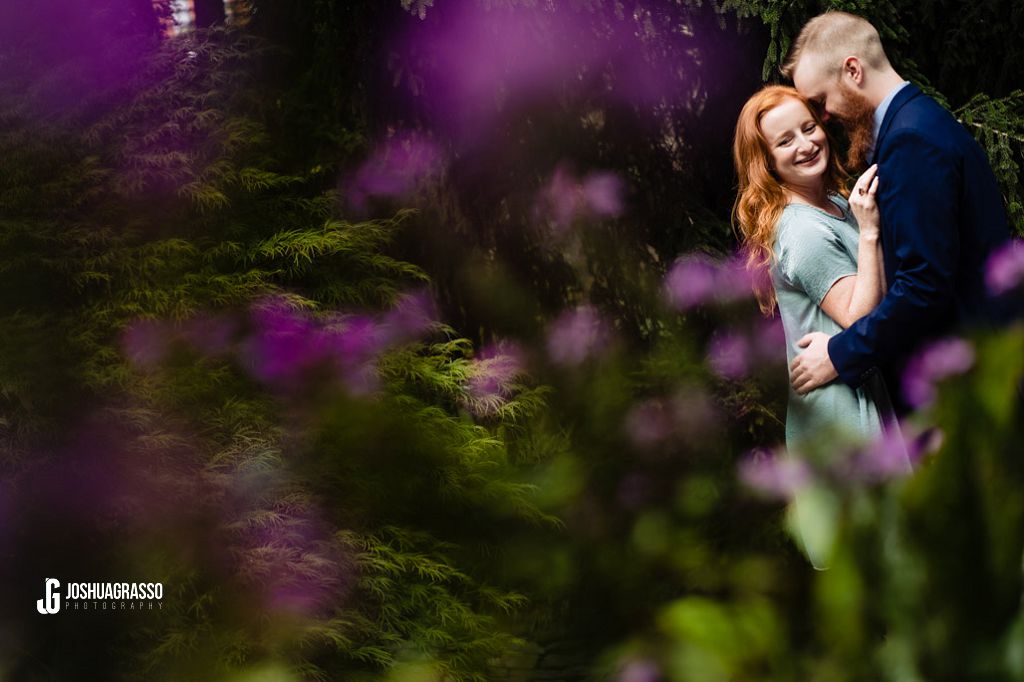
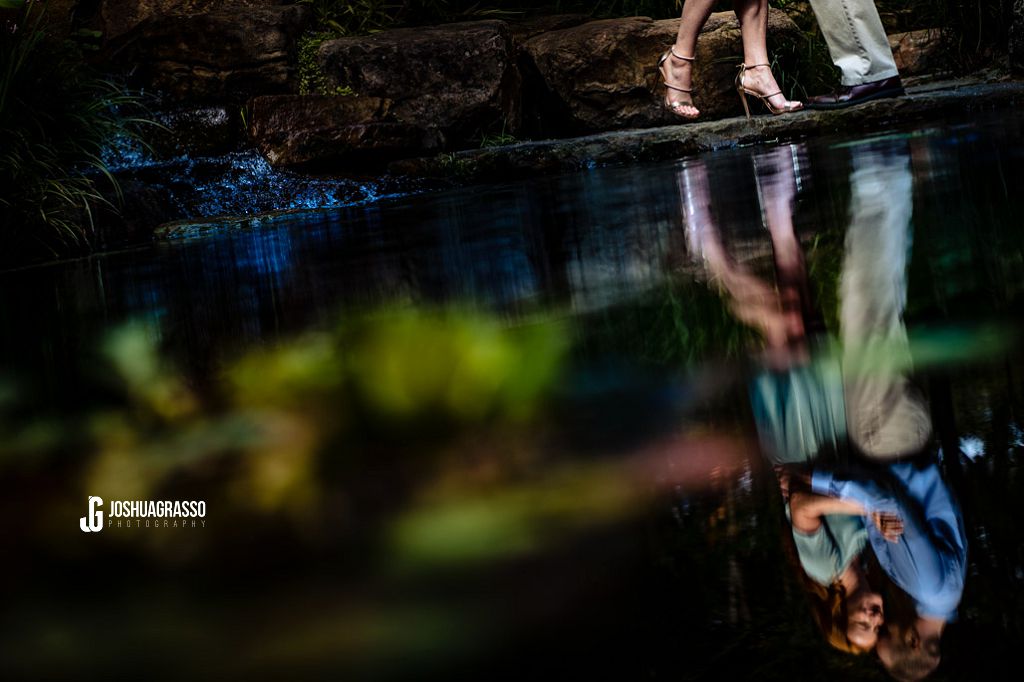
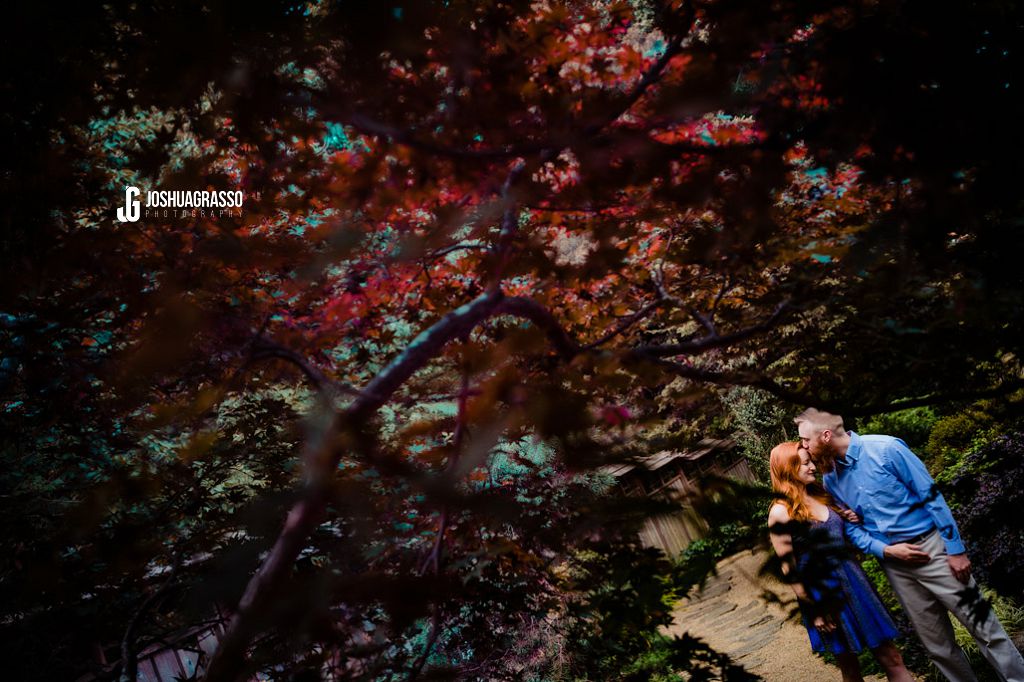
In some special cases, like this garden for example, you will definitely want to use the interesting elements around you. Keep in mind that sometimes these elements can be too complex to the point where it may take away from the subjects. That’s when you’ll want to experiment with these components by shooting subjects from different angles, and using your surroundings as either a background or a foreground.
You can test new perspectives by trying to pose subjects close to a structure in a busy scene (like an arch or stone wall). This minimalizes visual clutter and helps get the focal point back on the subjects to make them stand out.
If you want to try a variety of angles in conjunction with posing near a structure, try shooting from a wide angle first, then maybe a medium angle, and even a tight angle. Getting up close to the subjects would be considered shooting from a tight position. This makes the subjects a stronger and more dominant part of the frame. A medium angle captures just enough of them and what’s around them. A wide angle would be shooting from far away and showing more of their surroundings while still highlighting their presence in the background.
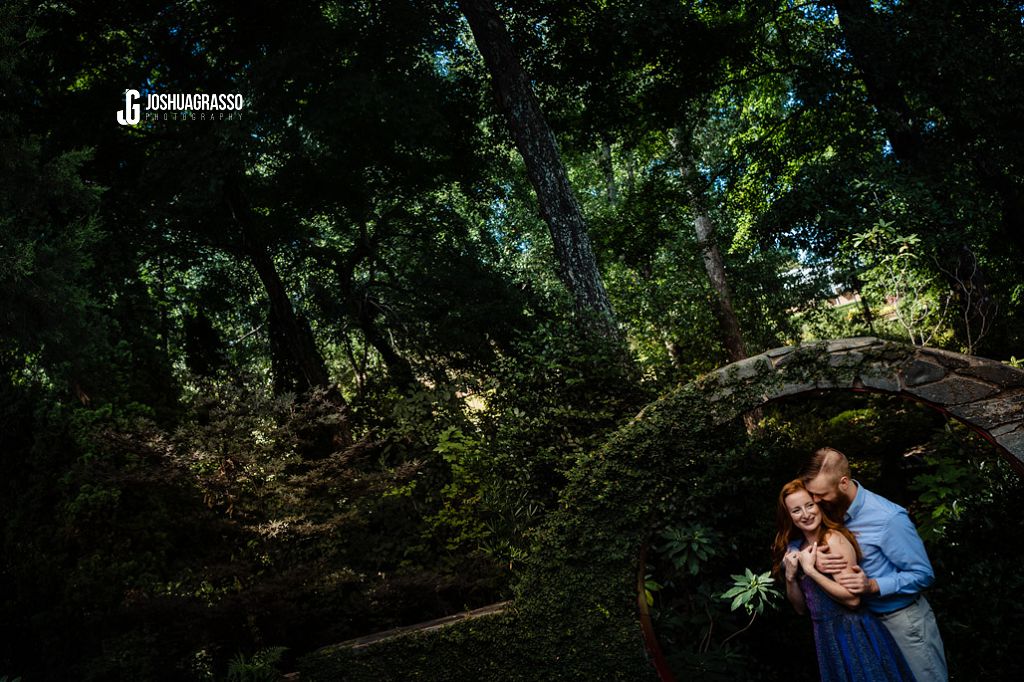
Wide angle 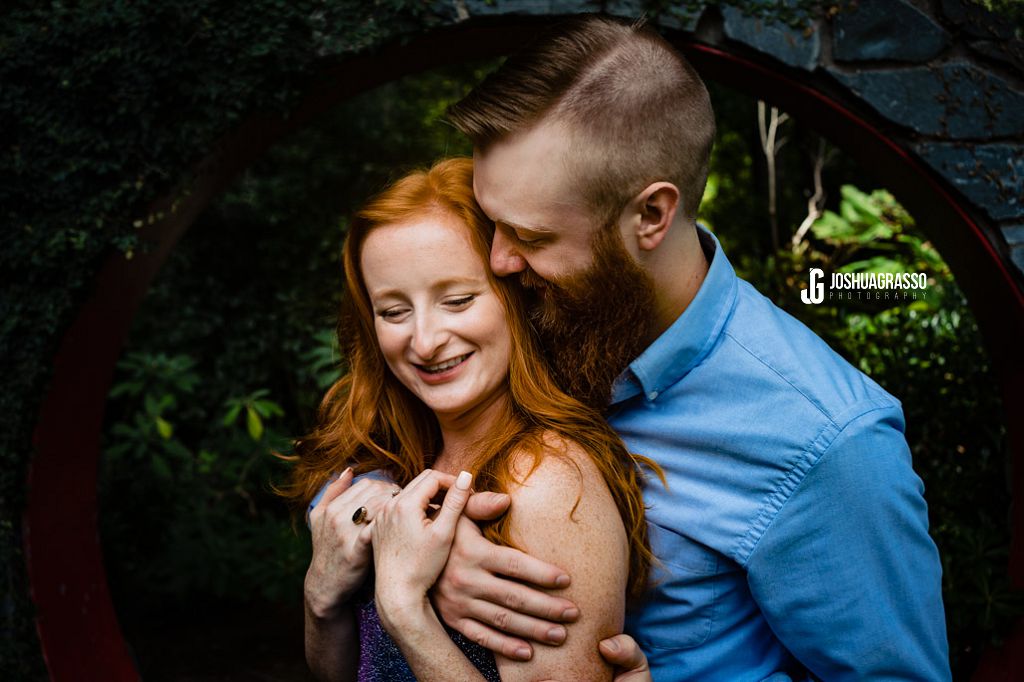
Tight angle
Using Elements as Backgrounds and Foregrounds
In this garden session, Joshua used trees as both a background and a foreground.
By assuming a down angle and shooting up at his subjects, Joshua using the trees as a background resulted in the successful use of “the bokeh effect.” The bokeh effect in photography refers to the aesthetically pleasing blur or out of focus aspect of a frame. With the sun shining through the trees in the garden and the subjects posed in front, the bokeh effect created an out-of-focus beautifully lit background for the couple.


To create diverse portrait options, Joshua also used trees and flowers as the foreground by capturing those elements up close, then placing the subjects in the background. Highlighted by the light, the frame was filled with complexities from the leaves, but the couple was still centralized in the main part of the frame.
Key Session Lessons
Hopefully, you learned some useful tips about backgrounds, foregrounds, shooting angles, and lighting effects from this garden session.
- Remember to always look for and alleviate lighting hotspots that have the potential to take away from the focus of your subjects.
- Shooting your subjects from different angles can have a significant effect on the way they come into focus.
- Use small elements and structures as a background or foreground in portraits to redirect focus to your subjects and to fill up the frame.
- After a shoot, look back through your photos and make note of specific details you like and want to recreate. Or make a note of things you want to work on for next time!
Don’t forget to check out The Shutter School blog for more photography tips, and click here for a more in-depth look at the rest of the portraits from this garden shoot.